A while ago I once again blitzed what was on my Raspberry Pi and started a new project using Retropie. Retropie is Debian based but has no desktop environment to speak of. You switch it on, it runs emulationstation, emulationstation runs other apps. It’s fairly basic but it also has an optional package for Kodi, so I could replace my bastardised Openelec box and my dedicated Raspbian box and find something in the happy middle ground.
While I won’t go into Retropie as there is a lot of content already out there – I thought I’d cover something a little newer. “Moonlight (formerly known as Limelight) is an open source implementation of NVIDIA’s GameStream protocol. We implemented the protocol used by the NVIDIA Shield and wrote a set of 3rd party clients.”
Pre-Requisites:
- Pi 2 (the model I have, 3 will probably be fine but the 1 might struggle)
- Debian Jesse based system, as I said I’m using Retropie (Although Arch is also supported)
- An Nvidia card running Geforce Experience – mine is a GTX 960 so I’m benchmarking at that
- A fairly stable network connection, my Pi and PC are both wired connection but WiFi may slow things down
- SSH connection to your Pi and some basic command line knowledge
Installation
So first of all install the source-repo where we can download moonlight. Open up your apt sources list and add their deb archive.
$sudo nano /etc/apt/sources.list

deb http://archive.itimmer.nl/raspbian/moonlight jessie main
An example of mine is below
Now you need to add the GPG Key, this key verifies that all the packages you’re downloading have come from the same verified source – to prevent you installing rogue packages.
cd ~/

wget http://archive.itimmer.nl/itimmer.gpg

sudo apt-key add itimmer.gpg

apt-get update

apt-get install moonlight-embedded

rm itimmer.gpg
And that is the package installed.
Preparing for streaming
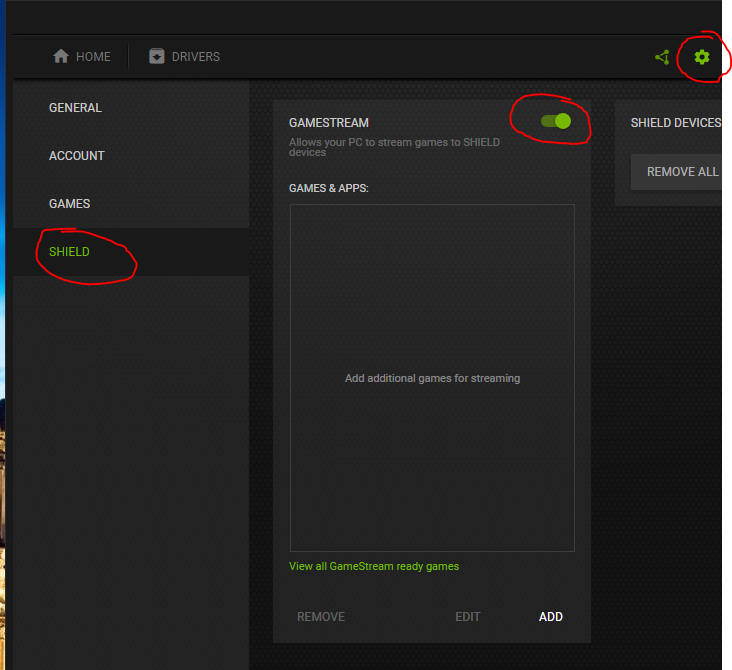 For this next section it’s probably a good idea to set up SSH on your host PC, you’ll need it to complete the setup process. First of all, you need to set up Nvidia Shield streaming. This is done through the GeForce settings menu, simply open up the GeForce screen, click the cog at the top right, select “Shield” from the menu and enable the GAMESTREAM option.
After that, ssh into your Pi and by running the following command you can try to connect to your PC
moonlight pair
This will scan the local network for nvidia shield servers, hopefully it will find your local machine and attempt to connect. When it does this it will offer a 4 digit pin which you must then enter on your host machine. Once it’s synced then steam big picture will likely launch, and in the lowest resolution possible. Just let it launch and then close it – stopping the stream. This should close moonlight running on your Pi too.
So the resolution is terrible, At this point it is worth familiarising yourself with moonlight by using man moonlight in which you will probably see that appending the flag -1080 or -720 will run the stream in 1080 and 720 respectively, and that the stream command will connect to a paired server. Therefore you can run your game stream using
moonlight stream -1080
This should launch big picture, on your pi, in 1080 resolution, which would be ideal – if not for the controller mapping. Most applications these days support controller mapping, and it’s a damned sight easier than it used to be, the only pain is mapping everything on each device. Thankfully moonlight supports this, simply use the following command to create a mapping configuration file.
moonlight map ~/Controller1.map

#Now just follow the steps on screen
Worth noting that the .map extension and the name of the file can be changed to whatever you want.
Once mapping is complete, move it to a more memorable location than on the home folder, I created a new folder in the RetroPie roms folder as I knew i’d be working out of there later.
mkdir ~/RetroPie/roms/moonlight/

mv Controller1.map ~/RetroPie/roms/moonlight/xpad-config
and now I can launch Big Picture, from my Pi, with my Xpad device mapped with the following command
moonlight stream -1080 -mapping /home/pi/RetroPie/roms/moonlight/xpad-config
Integrating into Retropie
Retropie’s menu structure is quite simple. There are a number of systems, those system on boot will scan a configured directory for files of a certain extension, those files when selected will execute a custom command in the shell. So in terms of our streaming platform, we just need to write a script to run the stream and have the system execute that. You could if you’re not a huge fan of having custom menus just stick it in the Ports System menu – but I’m getting ahead of myself.
As we already know the command to run our stream we just need to wrap that up in a bash script as below. Create a new file and enter the following nano ~/Retropie/roms/ports/moonlight.sh
#!/bin/bash

moonlight stream -1080 -mapping /home/pi/RetroPie/roms/moonlight/xpad-config
Save the file and make sure it has execute permissions chmod +x ~/Retropie/roms/ports/moonlight.sh and lo and behold if you navigate into your Ports folder on your retropie system you should see “MOONLIGHT” and executing it should start the game stream. You can stop here if you want. If you want to go further and create your own system menu for Emulationstation (like in the screenshot below) then keep reading.
First of all you need to create a custom systems config directory, this allows you to edit the systems XML without breaking the original. To do this simply back up the main systems config from the emulationstation install to your personal settings. You may find you’ve already done some of these steps for Kodi, so be careful not to overwrite your systems config if you’ve already done some manipulation in this area.
sudo cp /etc/emulationstation/es_systems.cfg ~/.emulationstation/es_systems.cfg
 Then open it up with
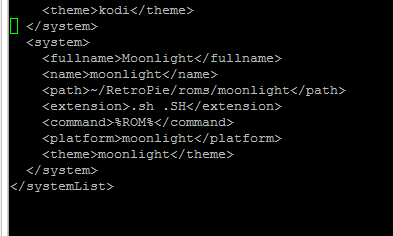
 nano ~/.emulationstation/es_systems.cfg and scroll to the bottom. You need to add a new System node for moonlight, which will scan a certain directory for certain file types, the same as any other system in Emulationstation does. So you need to create a new <system> node at the end of the file, but before the </systemList> entry. My system entry looked like it does on the right
If you’d like more information on what each node means you can check the wiki in the sources of this article. The main focus are the and elements. When emaulationstation launches it will load in system “Moonlight” and scan the <path> directory for any files ending with extension .<extension> in this case it’s going to look in ~/RetroPie/roms/moonlight for any .sh files.
So all that’s left for us to do is create the directory and copy our run time script.
cp ~/Retropie/roms/ports/Moonlight.sh ~/RetroPie/roms/moonlight/Moonlight.sh
Now when you reboot or reload ES you should see a moonlight option in the systems menu, when loaded it contains the MOONLIGHT script, which provided the host PC you paired earlier is switched on will launch Steam Big Picture.
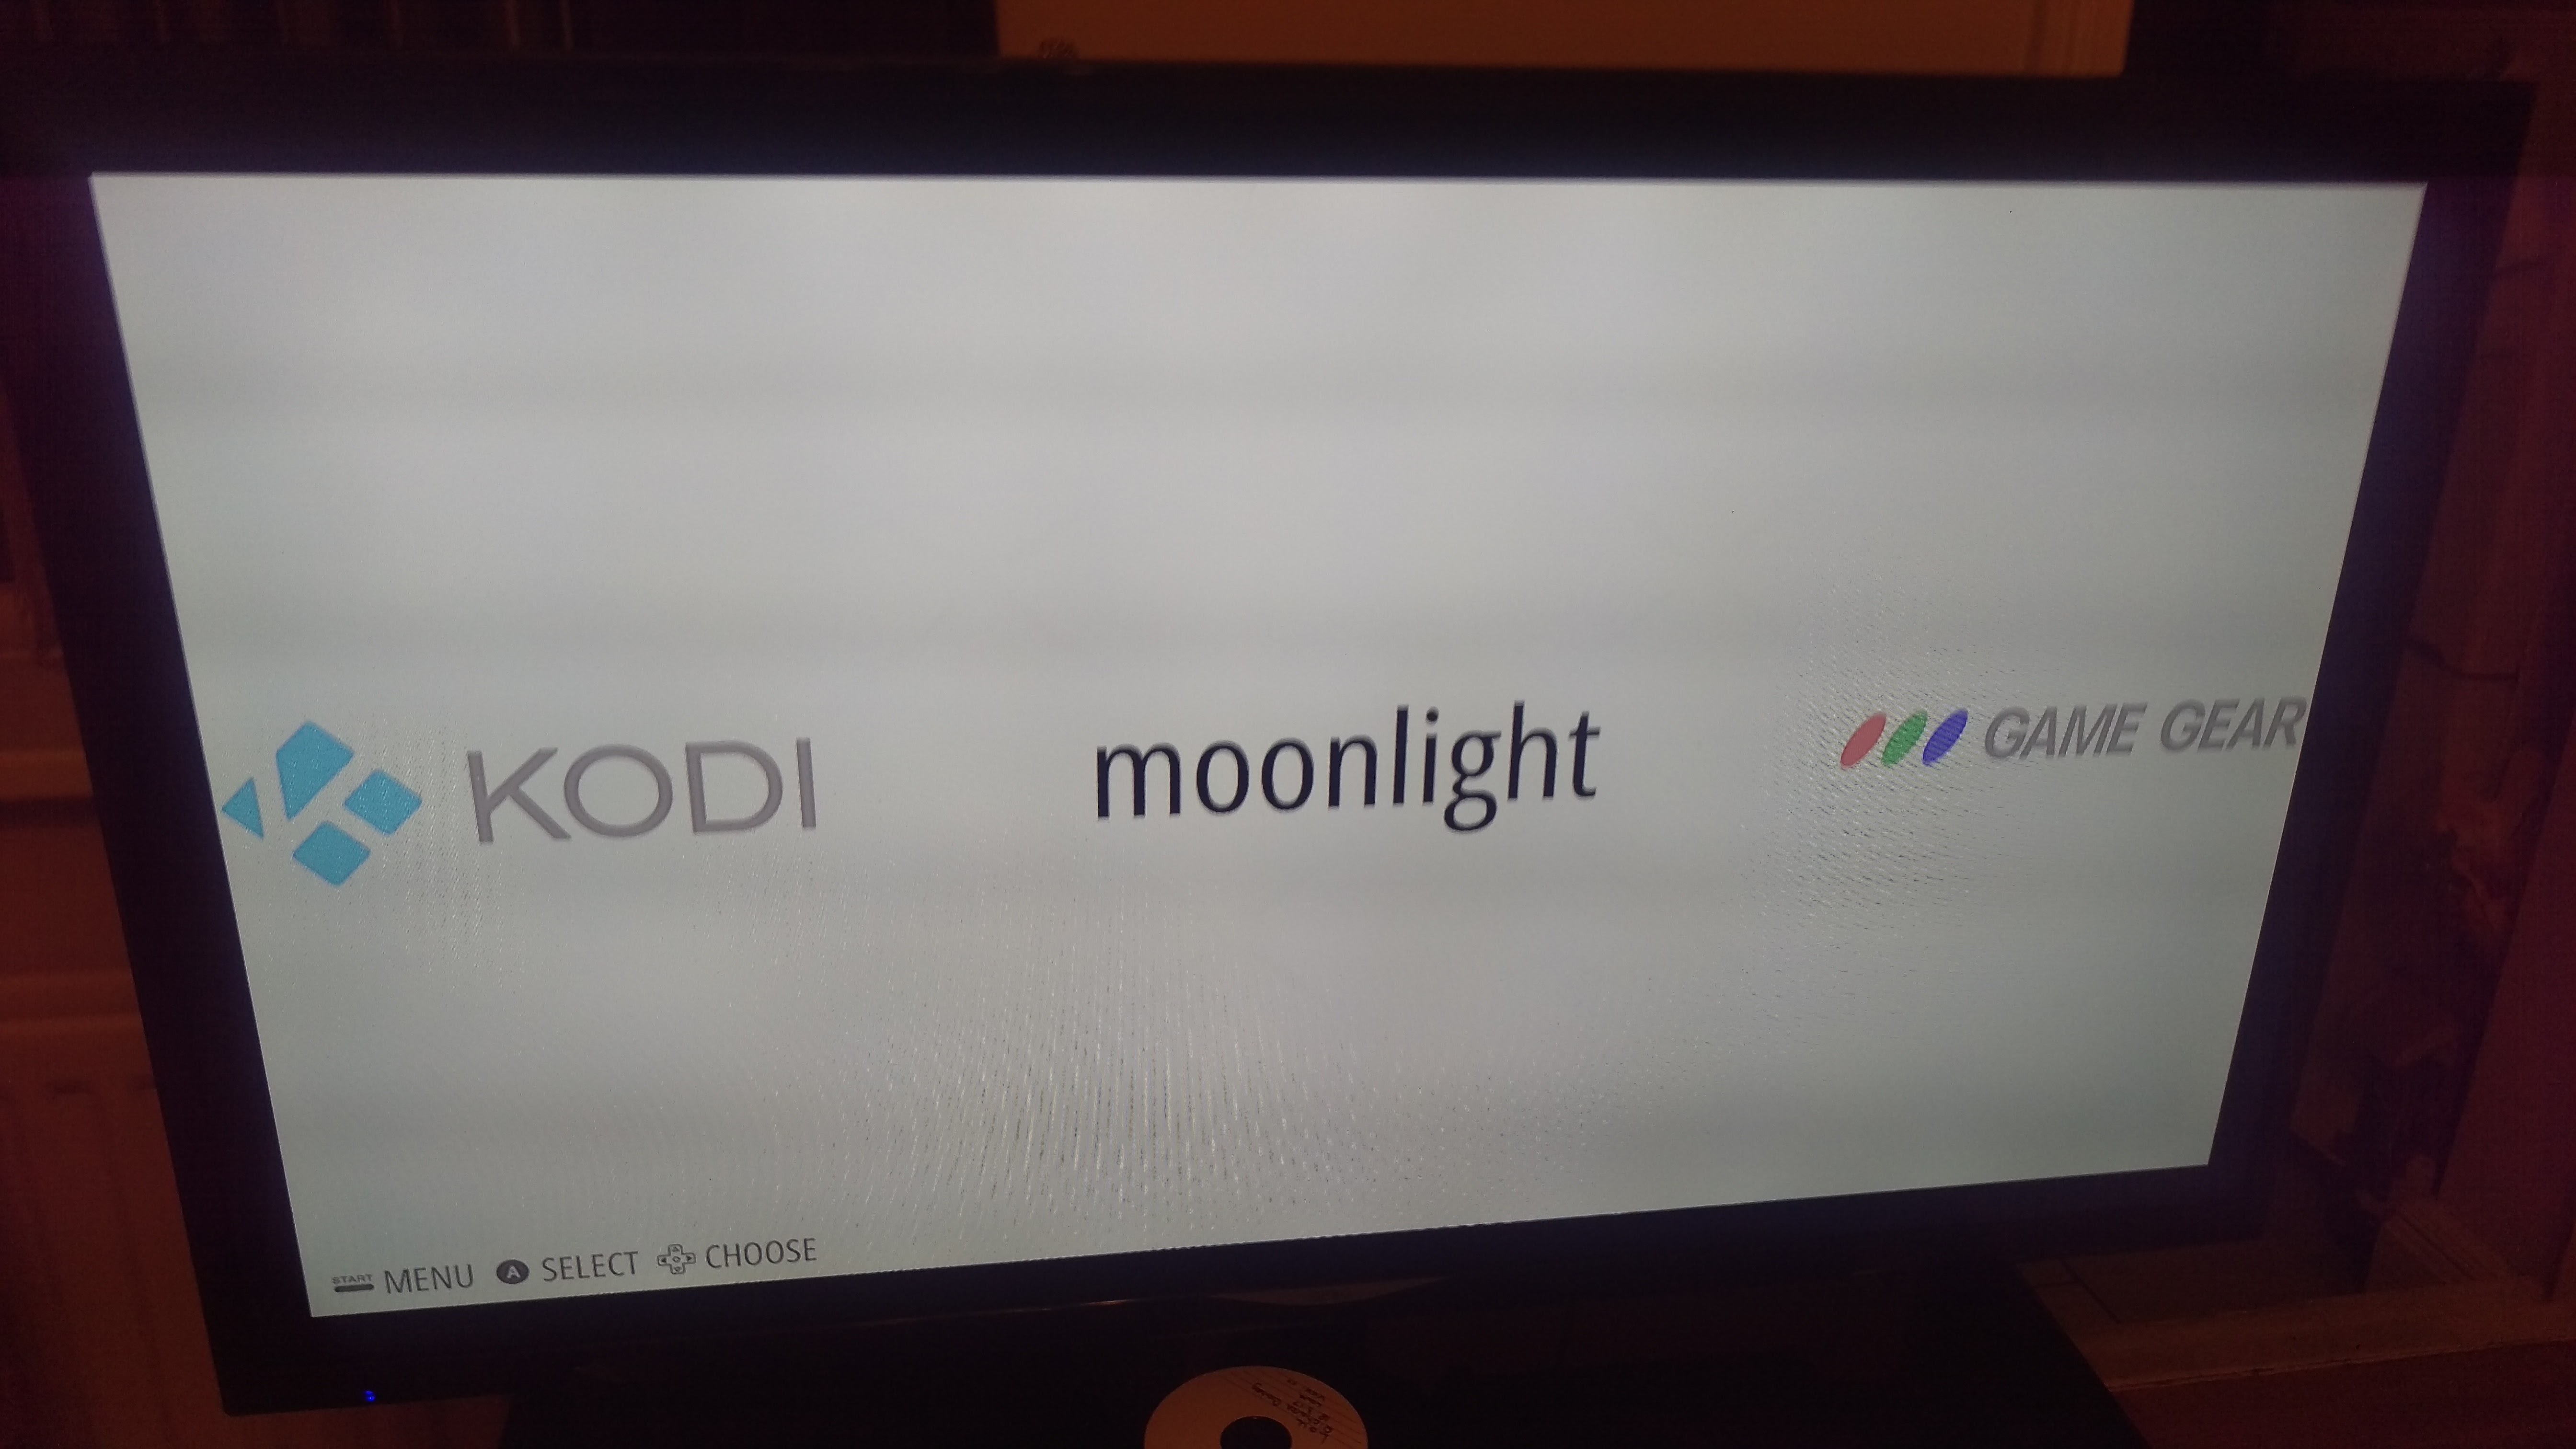 The only extra problem with this, is it kind of looks like crap…
This is because the theme settings for this don’t exist, and the default theme is the text value of the system, with plain white everything. It’s a little bit blinding so lets move onto the next section.
Creating a theme for Moonlight
This part took me the longest – mainly because I have frack all design skill and the folder structure was a bit funky – but essentially similar to the systems config we copied, the theme is a setup of vectors and XML documents so there’s not harm in cloning your current setup and making a ‘custom’ copy.
My current skin is “Eudora” so make sure when you start work you’re using the right folder to match your skin, as I spent a good 20 minutes editing Carbon to no avail. You can check which skin you use by checking the UI settings in your RetroPie menu.
So first of all copy your current skin and it’s contents to a working folder, then rename it so that EmulationStation can differentiate between the skins.
sudo cp -r /etc/emulationstation/themes/eudora /opt/retropie/configs/all/emulationstation/themes/eudora-custom
Then navigate inside and create a new folder for our theme, it has to match the value of the <theme> element we specified in the System config, I found it a lot easier to just clone an existing theme and replace the artwork, as everything is just based off vectors anyway…
 cd /opt/retropie/configs/all/emulationstation/themes/eudora-custom

cp -r ./kodi ./moonlight

cd ./moonlight
Now inside the moonlight theme folder I had 3 files (I know in carbon there is an additional Art folder so just bear in mind that the folder structure of a skin differs) 1 was the theme xml doc, one was the graphic for the “controller” i.e the transparent object which appears above the central bar in the menu, and one was the logo, which appears on the central bar in the emulationstation menu.
![]()
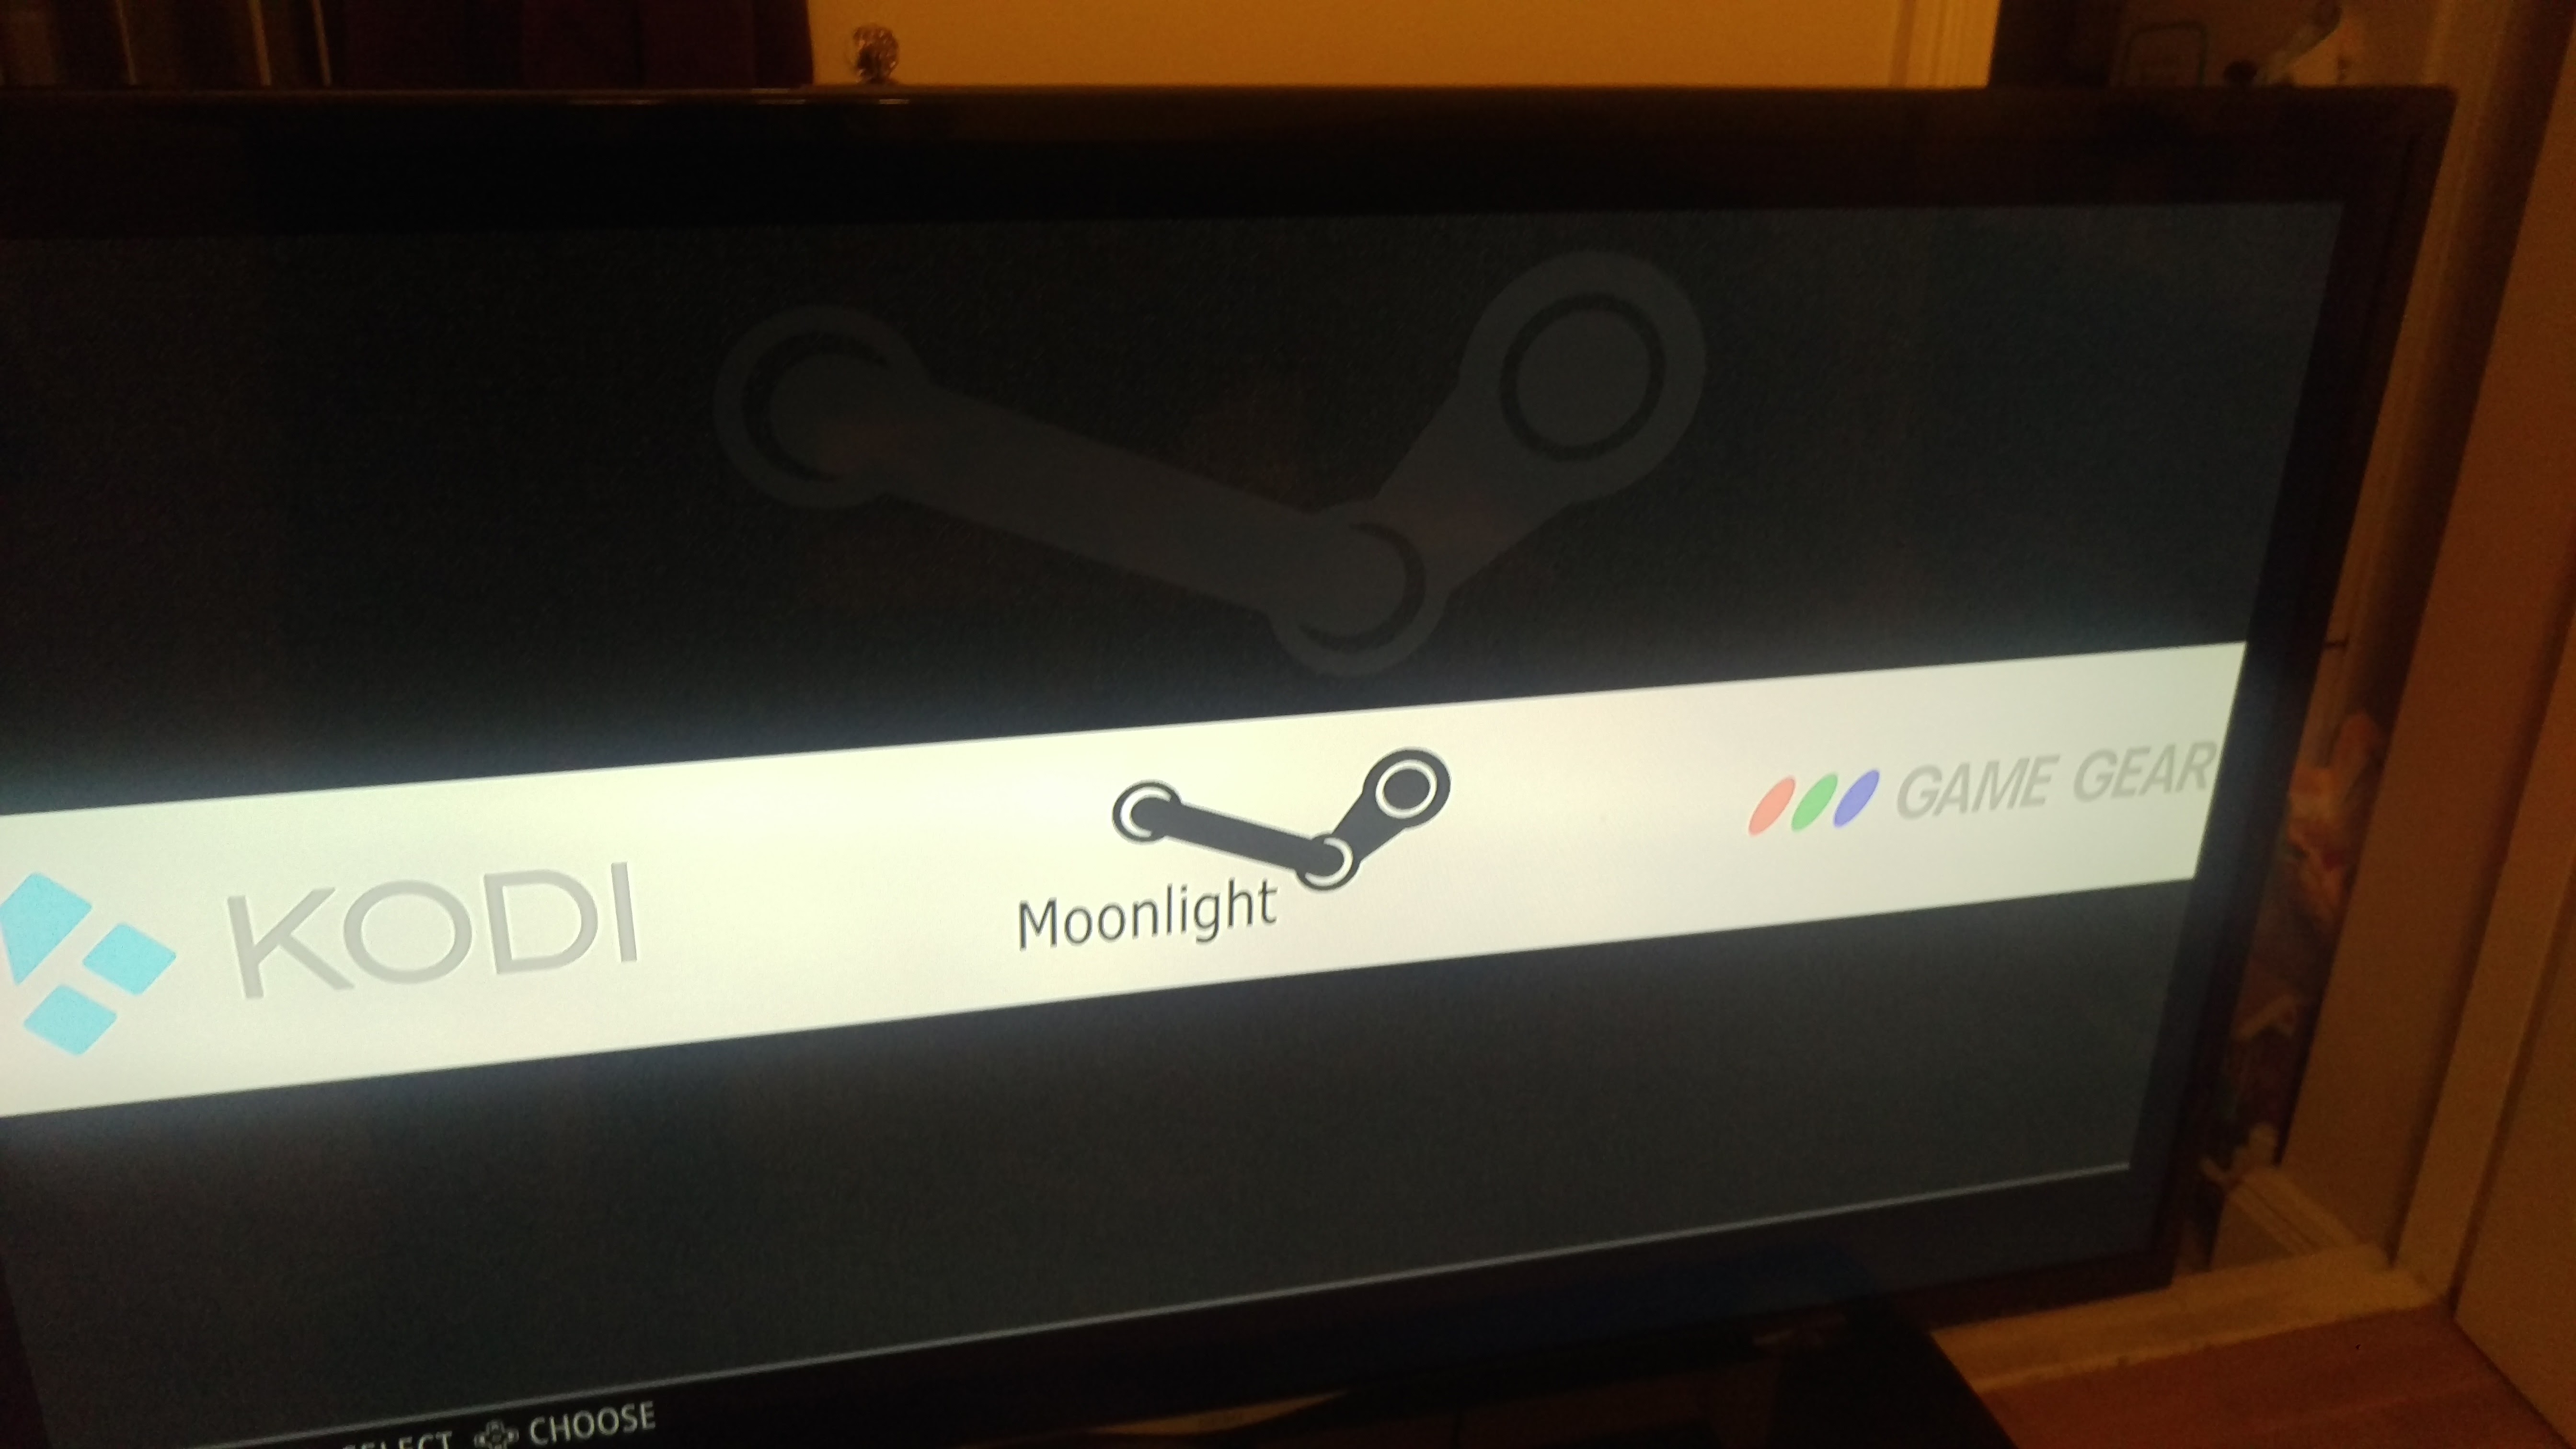
So all I had to do was replace controller.svg and logo.svg. Annoyingly but understandably, these are vector images. You can’t just whack them into Photoshop and expect it to work. I recommend Inkscape if you’re after something free and quick, but if you want to do some proper work on the subject I think you need to head down the Adobe illustrator route. I was just after a quick job so inkscape did me fine. I found a steam SVG icon online and uploaded that for the “controller”, then I opened the same image in Inkscape and added the text “Moonlight” I did try playing around with some effects, but like I said, I’m not a designer. It’s a little lacking but it works, and it got rid of the brilliant white and I know what it is now.
I uploaded both images via sftp into the target folder, then through the Emulationstation menu changed my skin from Eudora to Eudora-Custom, rebooted and that was it. Custom menu entry for a steam link running on my Raspberry Pi.
Sources:
Moonlight Website
Moonlight WiKi
Add a new system in Emulationstation
Leave a Reply